 |
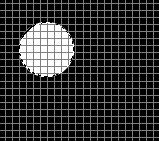
Start with a new RGB image with black Foreground and white background. Turn on the show grid and snap to grid. Use the marquee tool to draw a circle. Press delete. |
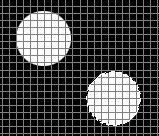 |
Hold down the ALT-key and use the Move Tool to create a copy of the circle. Place it down right of the first circle. |
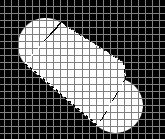 |
Now, use the Polygon lasso tool to create an area between the two circles. and press delete |
 |
Use the Magic Wand tool to select the whole figure. Make a copy (Ctrl+C) and paste it (Ctrl+V) and you´ve got a new layer. Go to Layer/transform and flip horizontal. Move it so it fit into the first figure and flatten the image. You can stop here if you want. But if you want to modify this shape, read on..... |
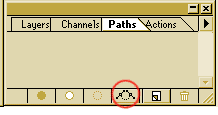 |
Now, select the Paths-option on the layers palette and create a new work path. |
| Chose the arrow in the menubar..... | |
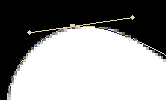 |
...and adjust the nodes to make the figure the way you want it. |
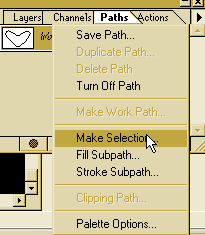 |
When you´re done with the adjustments, Go to the little arrow in the top right of the layers palette and Make Selection. You can now delete the working path. Save the selection. |
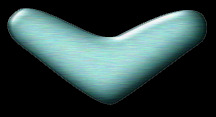 |
Now, delete everything in the image and load your selection. Fill it with desired color and apply |