      |
Now, go to the HTML-editor (whatever you use) and insert all the off-images. I use Frontpage 98.
I use to do like this because I get all the file names and image-sizes in the HTML-code that way. |
|
Now, go to the HTML-editor (whatever you use) and insert all the off-images. I use Frontpage 98.
I use to do like this because I get all the file names and image-sizes in the HTML-code that way. |
| When you have inserted all your images save the HTML-file as remote.htm.
Now, I use to work in a text editor when I use Javascript. Even if Frontpage 98 is quite good, it's messing up the code now and then.... I'm not an Javascript expert and I may be explain certain things wrong.... so.. If you are good at javascripts and see any errors... please let me know. I just know that this is working fine in Netscape 3, 4 and IE4. This is the code written by Doc Ozone (don't forget to mention him in the code) that we'll be working with: |
<script LANGUAGE="JavaScript">
<!--DocOzone's Javascript code,
copyright 1997
window.onerror = null;
var netscape = 0;
var goodIE = 0;

browserName = navigator.
appName.substring(0,8);
browserVer = parseFloat
(navigator.appVersion);
if (browserName == "Netscape"
&& browserVer >= 3)
{ netscape = 1; }
if (browserName == "Microsof"
&& browserVer >= 3.01)
{ goodIE = 1; }

if (netscape || goodIE) {
|
This part of the code contains information how the Browsers will "react" to the script and of course the copyright and credit lines to DocOzone. |
menu = new Array(6); standard = new Array(6); over = new Array(6); |
This is where you tell the script how many images you use in the remote. (just the off-images) I use 6 in my remote |
standard[0] = new Image; standard[1] = new Image; standard[2] = new Image; standard[3] = new Image; standard[4] = new Image; standard[5] = new Image; |
to load the off images (always start with 0) |
over[0] = new Image; over[1] = new Image; over[2] = new Image; over[3] = new Image; over[4] = new Image; over[5] = new Image; |
to load the over images.... |
menu[0] = new Image; menu[1] = new Image; menu[2] = new Image; menu[3] = new Image; menu[4] = new Image; menu[5] = new Image; |
...and the images that'll show up in the screen |
standard[0].src = "rem/but1off.jpg"; standard[1].src = "rem/middle.jpg"; standard[2].src = "rem/but2off.jpg"; standard[3].src = "rem/botleft.jpg"; standard[4].src = "rem/screen.jpg"; standard[5].src = "rem/botright.jpg"; |
here's the image source for the off images |
over[0].src = "rem/but1on.jpg"; over[1].src = "rem/middle.jpg"; over[2].src = "rem/but2on.jpg"; over[3].src = "rem/botleft.jpg"; over[4].src = "rem/screen.jpg"; over[5].src = "rem/botright.jpg"; |
here's the image source for the on images |
menu[0].src = "rem/text1.jpg"; menu[1].src = "rem/screen.jpg"; menu[2].src = "rem/text2.jpg"; menu[3].src = "rem/screen.jpg"; menu[4].src = "rem/screen.jpg"; menu[5].src = "rem/screen.jpg"; |
...and this is for the screen images. When you move the mouse over button 1 (over[0]) it will change the screen in menu [0] |
}
function msover(num) {
if (netscape || goodIE) {
document.images[num].src = over[num].src;
document.images[4].src = menu[num].src; } }
function msout(num) {
if (netscape || goodIE) {
document.images[num].src = standard[num].src;
document.images[4].src = menu[4].src; } }
function preload() {
if (netscape || goodIE) {

}}
// -->
</script>
|
Here, you define which image to be switched when you move the mouse over a certain button, and as you can see it's image number 5 if you count the images from topleft to bottom right. But since the script starts at 0, the number will be 4 |
| Everything above goes inside the <head></head> tags |
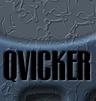
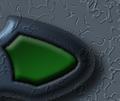
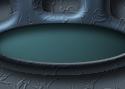
<img src="rem/but1off.jpg" width="114" height="101" alt="but1off.jpg (2683 bytes)" border="1"> <img src="rem/middle.jpg" width="96" height="101" alt="middle.jpg (2606 bytes)" border="1"> <img src="rem/but2off.jpg" width="120" height="101" alt="but2off.jpg (2544 bytes)" border="1"><br> <img src="rem/botleft.jpg" width="97" height="89" alt="botleft.jpg (2005 bytes)" border="1"> <img src="rem/screen.jpg" width="125" height="89" alt="screen.jpg (2211 bytes)" border="1"> <img src="rem/botright.jpg" width="108" height="89" alt="botright.jpg (2145 bytes)" border="1"> |
Now, if you look at the body in the HTML-code it will look something like this: <<< These are the images you inserted in your editor. Replace border="1" to Border="0" and rename all the alt-tags to your own. |
<a HREF="side1.html" onmouseover="msover(0); window.status= 'SIDE ONE'; return true" onmouseout ="msout(0)"> |
Copy this code and place in front of all the <img src that shall have a onMouseover effect. In this case but1off.jpg and but2off.jpg |
| Change the side1.html to your own link and the window status to your own text and don't forget to add the end tag </a> after the img src tag.
As you can see, the first "msover" and "msout" got the number zero. The second image will get number 1, but you don't write that because this second image does not have any onMousover effect. The third image however got an onMouseOver image and will get number 2... should looks like this: |
<a HREF="side2.html" onmouseover="msover(2); window.status= 'SIDE TWO'; return true" onmouseout ="msout(2)"><img src="rem/but2off.jpg" width="120" height="101" alt="Side 2" border="0"></a> |
| Well, that's it.... if you done it all right you will now have a nice Navigation system with a on MouseOver effect and with switching screen images.
Good Luck! |