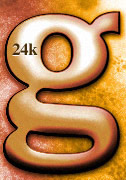
Gold
Text
Copyright©
1997-1999 Mark Monciardini
|
| This
turned out to be a intermediate/Advanced user tutorial. I have
included the tool commands and there location if Novice users
would like to try. Adjustment Layers, Layer Overlaying and channels
will be used for this tutorial and it helps if you're familiar
with them.
For
this lesson I used the font "Garamond Bold at 215 pixels
big. You may download this font to follow along if you like.
I have a Windows Version here.
|
|
|

|
|

|
1.)
Make a new RGB Image 175 pixels wide by 175 pixels high. Lets
fill the background layer with some color or texture. I encourage
you to use the color I have, it really goes well with the gold.
If you want this color, double click the Foreground color on
the tool bar and you will then see the color picker. Where it
says R, G, B, enter the numbers I have and then click OK. Now
fill the background layer in. |
|
|
|
| 2.)
Lets go into channels:
Window >Show Channels. Now make a new Channel, this becomes
"Alpha 1" |
|
|

|
|
3.)
Use
the Type Tool ( press T ) and make a lowercase "g"
in Alpha 1. Deselect selection ( Ctrl-D ).
|
|
|
|
4.)
Make
a Duplicate of that channel by dragging Alpha 1 to the new channel
button.
Now Gaussian Blur Alpha 2. ( Filter>Blur>Gaussian
Blur ) Enter 3.4 for radius and click OK. Hold
down the Control key and click on Alpha 1. Invert that selection
and then press the Delete Key. Now Deselect
( Ctrl-D ).
|
|
|
|
| 5.)
Go back to the
Layers ( Windows>Show Layers ). Click on the Background Layer,
then make a new Layer ( Layer>New>Layer ) and fill it
in with White. |
|
| 6.)
Go
to >Filter>Render>Lighting Effects. Ok match my settings
close as you can, this also goes for the 2 colors I have. Click
those spots to bring up the color picker. For the top one I
used R –253 G-217 B-71. Make the Properties color on the
bottom about the same. |
|
|
|
|
|
| 7.)
Load Alpha 1:
Select>Load Selection and choose "Alpha 1" Under
Channel and click OK. Inverse Selection: Select>Inverse and
press Delete. Now Deselect ( Ctrl-D ).
After that I decided to give
it a cool Drop Shadow to bring it out a bit: Layer>Effects>Drop
Shadow and I included a shot of the set up I used above.
|
|
|
|
| 8.)
Hold
down the Control Key and click on Layer 1. Make a new layer
and then fill the selection in with the brown that I made, this
is kind of important so it will produce the right tone. Now
choose "Color" from the layers pop down menu. Don’t
lose your selection yet.
|
|
|
|
| Ok
it looks pretty cool right now, but sometimes we need more brighter
gold with stronger highlights. We’ll also work on the toning
a bit. |
|
|
|
| 9.)
Make a new layer.
Contract the selection about 6 ( Select>Modify>Contract
). Fill with 90% White: Edit>Fill. Deselect ( Ctrl-D ). Take
the Opacity of that layer down to 65. Now Gaussian Blur ( Filter>Blur>Gaussian
Blur ). This part is really a personal choice. I used 1.7. Ok
now choose "Color Dodge" from the layers popdown menu.
|
|
|
|
| 10.)
For more brass
tone, Load Alpha 1: Select>Load Selection. For Channel choose
Alpha 1 and click OK. Make an Adjustment Layer: Layer>New>Adjustment
Layer. For "Type" make sure its set to Hue/Saturation
and click OK. Now click on the Load button and Load this Hue
file I have for you. Click on this icon and download the file.
Load
it and click OK. You are done.
|
|
| After
this tutorial was made, I was playing around with the effect
and actually found by using other different size fonts and images
that the effect actually looked even better. I've included some
of those tests and a description of what I did. Everything below
was made with this tutorial with only a few extra adjustments. |
|
|
|
|
Here's
a sample logo. I applied some Noise to Layer 1 to give it more
detail and when it came time to blur layer 3, I only did just
a touch. This font had rough edges already made. So if you like
this look then try roughing up the edges of your letter when
you're channels like in Step 3. |
|
|
|
This
next shot is a sample idea on what you can use this gold with.
The background texture you see was made with my Old Gold Tutorial
here. |
|
|
This
one shines so bright I think it hurts my eyes a little.
The
only difference here is I made my "Height" bigger
and made more exposure when doing the Lighting Effects part.
Sense it was brighter my Color Burn effect came out even brighter.
|
|
|
This
was made when my text was really big, then I sized it down smaller.
So yes it does matter about size. Try doing this with bigger
text and you'll get different results. |
|
|
|
|
Copyright©
1997-1999 Mark
Monciardini
<<<<retour
tutoriels
|