 |
Load the selection Alpha 1. Copy and paste into a new layer. Add the layer effect Inner Shadow as shown here to the left.
You have now created the "onMouseOver" effect on the buttons.
|
|
Load the selection Alpha 1. Copy and paste into a new layer. Add the layer effect Inner Shadow as shown here to the left.
You have now created the "onMouseOver" effect on the buttons.
|
 |
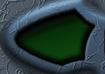
Create an elliptical shape and fill it with green. apply the layer effects Innershadow and outerbevel so it will look similar to this screen to the left. Then use the type text-tool to add some text. A new layer is created. |
| When you are done with all the text, you sould have as many textlayers as you have buttons. I suggest that you save your work here, as an PSD-file.
Add a new layer and fill it with a red colour. Set the layer opacity to 40. Then use the Marquee tool to select the different images. Save the selection and press delete |
| Zoom to 300% and place the cursor exactly next to the image that you just cutted out. Save the the new selection. Repeat this to all the images. | 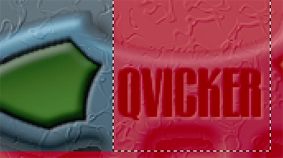 |
| Now turn all the "on effects" off by clicking at the litlle eye that's on each layer in the Layers box. Save your work and Flatten the image.
Load the first selection and press Ctrl+C. Go to File/New (Ctrl+N) and press Ctrl+V (Paste) and here you have you first "on-image" Save a copy as Butt_on.jpg. Repeat this procedure with all the images. Go to History and click right above where it says Flatten Image. Turn on the layer with the "on effects" and flatten the image. Load the selections as you did in the previous step and do the same procedure with this "off-images" Save a copy as Butt_off.jpg. |
| Now load the selection where the text shall appear. And go to Image/Crop. Turn on the first text layer and save a copy as First_text_screen.JPG.
|
 |
| This is the image that will appear when you move the mouse cursor over the first button. Turn that textlayer off , turn the next layer on and save a copy as..... Do this with all the textlayers.
Now we are ready to put all images together in one big fine working remote control ;-) |